
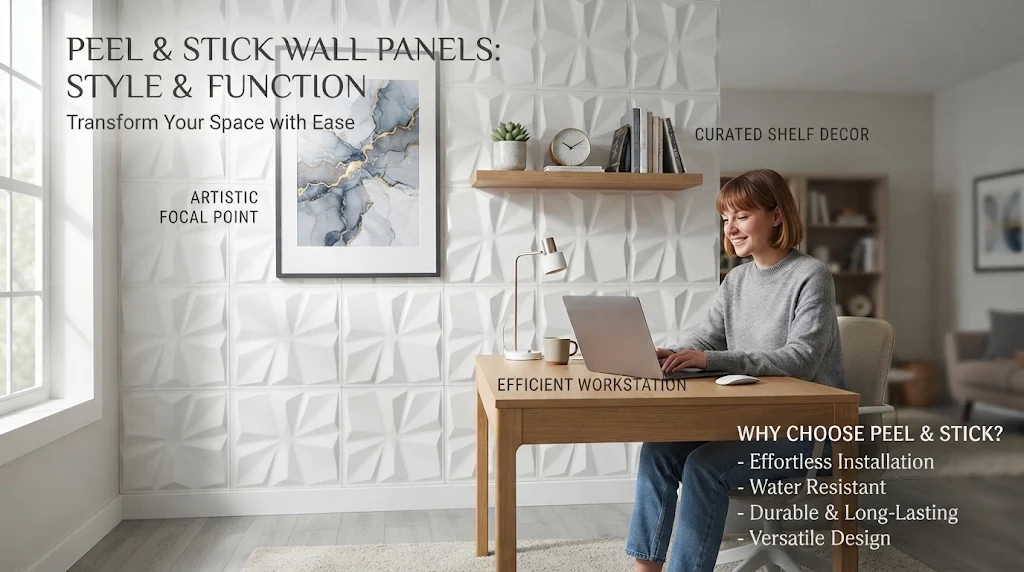
Home improvement projects often feel overwhelming. Many people want a fresh look without the mess of paint or heavy construction. Peel and stick wall panels offer a simple solution for this common problem. These self-adhesive tiles snap onto your walls with ease. You do not need special tools or professional skills to install them. The primary appeal lies in their speed and convenience. Homeowners can transform a room in just one afternoon. This method saves time and reduces stress significantly. It is a popular choice for renters too. Landlords often allow these temporary updates. They leave no permanent damage behind. This makes them ideal for leased spaces.
This guide explores the true durability of these panels. We will examine how well they hold up over time. You will learn about different materials and styles available today. We cover wood, PVC, and three-dimensional designs. Each type has unique benefits and limits. You will discover which rooms suit them best. Bathrooms and kitchens have specific moisture needs. Living rooms and bedrooms have different aesthetic goals. We also address common installation mistakes. Fixing errors early saves money later. Read on to find out if these panels are right for your home. You will gain clear answers about their lifespan.
Understanding Material Types and Quality
The material determines how long the panel lasts. Polyvinyl chloride (PVC) is very common. It resists water and humidity well. This makes it great for bathrooms. Wood veneer panels offer a natural look. They feel warm and authentic to the touch. However, real wood needs more care. It can warp if exposed to too much moisture. Medium density fiberboard is another option. It provides a smooth surface for painting. Some panels use foam for a soft texture. These are often used for acoustic purposes. They help reduce noise in busy rooms. Always check the thickness of the panel. Thicker panels usually last longer. They resist dents and scratches better. Thin panels may tear during installation. Look for high-quality adhesive backing. Weak glue causes panels to fall off. Strong adhesive ensures a secure bond.
Large peel and stick wall panels cover more area quickly. They create fewer seams on your wall. This gives a cleaner and modern appearance. Small tiles work well for detailed patterns. They allow for creative designs on stairs. Three-dimensional panels add depth to flat surfaces. They catch light in interesting ways. Grey and white tones remain very popular. They match almost any decor style. Black panels create bold statement walls. They add drama to living rooms. Choose colors that fit your existing furniture. Consider the lighting in your room. Dark colors absorb light while bright ones reflect it. Check reviews from other buyers. Real user experiences reveal hidden flaws. Look for comments about adhesion issues. Note any reports of fading colors. This research helps you avoid poor products.
Installation Best Practices for Longevity
Proper preparation is key to success. Clean the wall surface thoroughly first. Remove all dust and grease spots. Use a mild soap solution for cleaning. Let the wall dry completely before starting. Any moisture traps air under the panel. This causes bubbles and peeling later. Measure your wall space carefully. Plan your layout before peeling anything. Start from the center or a corner. Work outward to maintain symmetry. Use a level to keep lines straight. Crooked panels look unprofessional and messy. Peel back only a small section of backing. This gives you control during placement. Press firmly from the center outward. Use a soft cloth to smooth it down. This removes trapped air pockets effectively.
Trim excess material with a sharp utility knife. Cut along edges for a clean finish. Pay extra attention to corners and outlets. These areas require precise cutting skills. Take your time to avoid mistakes. Rushing leads to wasted panels and frustration. Ensure the room temperature is moderate. Extreme cold makes adhesive stiff. Extreme heat makes it too soft. Ideal conditions help the glue bond properly. Avoid installing in very humid weather. High humidity weakens the initial bond. Wait for a dry day if possible. Let the panels set for twenty-four hours. Do not touch or clean them immediately. This waiting period strengthens the hold. Proper installation extends the life significantly.

Performance in High Moisture Areas
Bathrooms present unique challenges for walls. Steam and splashes happen daily here. Standard paper wallpaper fails quickly. Peel and stick panels handle moisture better. PVC options are fully waterproof. They do not swell or rot when wet. Wipe them down easily after showers. This prevents mold and mildew growth. Ensure good ventilation in the bathroom. Use an exhaust fan during hot showers. This reduces overall humidity levels. Check the seal around edges regularly. Water can seep behind loose panels. Reapply adhesive if edges start lifting. Kitchen backsplashes face similar issues. Grease and food splatters occur often. Smooth surfaces clean up very easily. Avoid textured panels near stoves. Grease gets trapped in deep grooves. Flat panels wipe clean with a sponge.
Acoustic peel and stick wall panels serve dual purposes. They absorb sound waves in noisy spaces. This is useful for home offices. Video calls sound clearer with less echo. Bedrooms benefit from quieter environments. Better sleep comes from reduced noise. These panels often use foam cores. Foam is lightweight and easy to cut. It does not handle water well though. Keep acoustic panels away from sinks. Use them on dry interior walls only. Combine style with function wisely. Choose colors that calm the mind. Soft greys and whites promote relaxation. Darker tones add coziness to bedrooms. Match the panel texture to your goal. Smooth finishes look sleek and modern. Textured finishes add visual interest.
Common Mistakes and Troubleshooting Tips
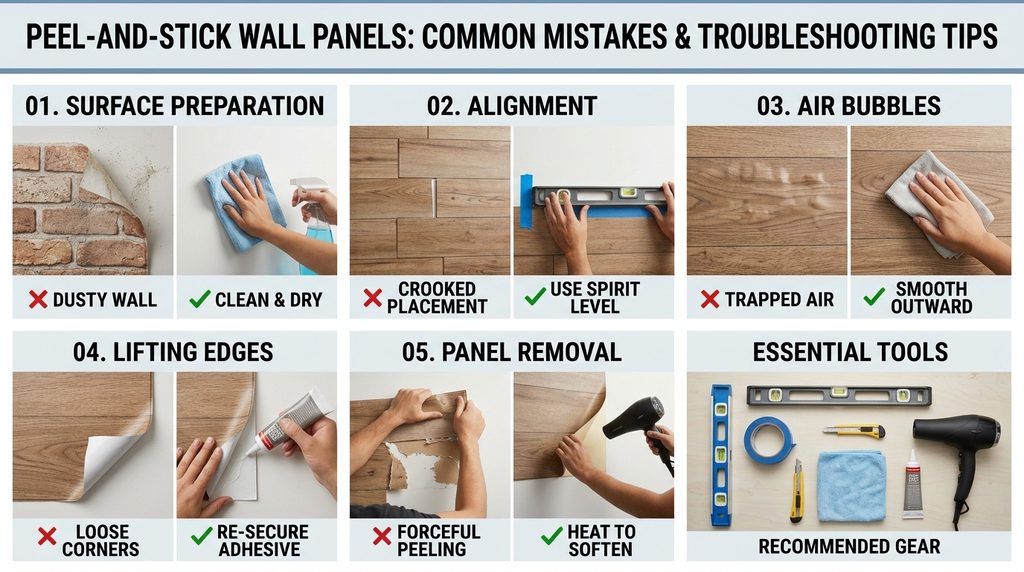
Many beginners rush the preparation phase. Skipping cleaning causes immediate failure. Dust creates a barrier between glue and wall. The panel sticks to the dust instead. It falls off within days or weeks. Always take time to prep the surface. Another common error is poor alignment. Starting crooked ruins the whole wall. Double-check your first piece placement. Use painter’s tape as a guide line. This ensures straight rows across the room. Removing panels can damage drywall paper. Pull slowly at a forty-five degree angle. Use a hair dryer to warm the adhesive. Heat softens the glue for easier removal. This protects your underlying wall surface.
Bubbles form if you press incorrectly. Start from the middle and push out. Do not start from one edge. Trapped air has nowhere to escape otherwise. Use a pin to pop large bubbles. Press the area flat again immediately. Small bubbles may disappear on their own. Warmth helps the adhesive flow slightly. Edges lifting is a frequent complaint. This often happens in high traffic areas. Apply extra adhesive to corner edges. Use clear caulk for a permanent seal. This prevents dirt from getting underneath. Check manufacturer instructions for specific tips. Each brand has unique adhesive properties. Follow their guidance for best results. Contact customer support for persistent issues. They may offer replacement parts or advice.
Cost Effectiveness and Value Analysis
Peel and stick panels save on labor costs. You do not need to hire professionals. This makes them budget friendly initially. Compare prices per square foot carefully. Large panels often cost less overall. They cover more area with fewer pieces. Factor in the cost of tools needed. You may need a level and knife. These are small one-time expenses. Consider the lifespan compared to paint. Paint needs repainting every few years. Panels can last five to ten years. High quality ones last even longer. This reduces long term maintenance costs. Renters save on security deposits. No damage means full refund potential. This financial benefit is significant for tenants.
Resale value impact is worth considering. Buyers appreciate updated modern looks. Neutral colors appeal to most people. Bold designs may limit buyer interest. Stick to classic styles for resale. White and grey are safe choices. Wood tones add warmth and value. Avoid overly trendy patterns. They may look dated quickly. Classic designs remain stylish longer. This protects your investment over time. Calculate the cost per year of use. Divide total cost by expected lifespan. This gives you a yearly expense figure. Compare this to other renovation options. Tiles and hardwood cost much more upfront. Panels offer a middle ground solution. They balance cost and aesthetics well.
Frequently Asked Questions
Can I install these panels over existing wallpaper?
It is generally not recommended to install over old wallpaper. The adhesive may not bond properly to the paper surface. Old wallpaper can peel away from the wall underneath. This causes both layers to fall off together. Remove the old wallpaper first for best results. Clean the bare wall thoroughly after removal. This ensures a strong and lasting bond. If removal is impossible, test a small area first. Press one panel firmly and wait a week. Check if it stays attached securely. If it lifts, do not proceed with the rest.
Do these panels work on textured walls?
Most manufacturers advise against using them on heavy textures. The adhesive cannot reach the low points of the texture. This creates weak spots where panels detach. Light orange peel texture might work with strong glue. Smooth walls provide the best surface for adhesion. You can skim coat textured walls to smooth them. This adds prep time but ensures success. Alternatively, use furring strips to create a flat surface. This method is more complex but effective. Always check the product label for texture limits.
How do I clean peel and stick wall panels?
Use a soft damp cloth for regular cleaning. Avoid harsh chemicals or abrasive scrubbers. These can damage the finish or print. Mild soap and water work well for most stains. Dry the surface immediately after wiping. Standing water can seep into edges. This weakens the adhesive bond over time. For kitchen grease, use a degreaser spray. Test it on a hidden spot first. Ensure it does not fade the color. Vacuum acoustic panels gently with a brush attachment. This removes dust without damaging the foam.
Will removing them damage my drywall?
Removal can damage drywall if done incorrectly. Pulling too fast tears the paper layer. Use heat to soften the adhesive first. A hair dryer works well for this task. Peel slowly at a low angle. Go inch by inch to control the process. Residual glue may remain on the wall. Use a gentle adhesive remover to clean it. Sand lightly if necessary before repainting. Some high quality panels claim damage free removal. Test this claim on a small hidden area. Never assume all brands behave the same way.
Are these panels fire resistant?
Check the specific product specifications for fire ratings. Many PVC panels have basic fire resistance. They meet standard building code requirements. However, they are not fireproof materials. Do not install them directly behind stoves. Keep them away from open flames and heaters. Wood veneer panels burn more easily than plastic. Treat them with caution in high heat areas. Look for Class A fire rated labels if safety is a priority. This information is usually on the packaging. Contact the manufacturer if you cannot find it.
Can I paint over peel and stick panels?
Painting over them is possible but tricky. The smooth surface may reject standard paint. Use a primer designed for slick surfaces first. This helps the paint adhere properly. Test paint compatibility on a spare piece. Some paints may bead up or peel off. Latex based paints usually work best. Avoid oil based paints unless specified. Painting voids most manufacturer warranties. It also makes future removal harder. Consider buying pre colored panels instead. This saves time and ensures consistent color.
Final Thoughts
Peel and stick wall panels offer a versatile update option. They balance ease of use with visual appeal. Durability depends heavily on proper installation. Preparation and patience yield the best results. Choose materials that suit your specific room needs. Waterproof options protect bathroom walls effectively. Acoustic types improve sound quality in offices. Neutral colors ensure long term style relevance. Avoid common mistakes like skipping cleaning steps. Address issues like bubbling immediately for best outcomes. These small efforts extend the life of your panels significantly.
Consider your long term goals before buying. Renters benefit from the temporary nature of these updates. Homeowners enjoy the quick transformation without mess. Evaluate the cost against traditional renovation methods. Panels often provide better value for short term needs. They allow for frequent style changes easily. Experiment with different looks without major commitment. This flexibility is a major advantage today. Keep maintenance simple with regular gentle cleaning. Your walls will stay fresh and vibrant for years. Make informed choices based on quality and reviews.
Disclaimer
This article provides general information for educational purposes. It was written with AI assistance to guide your research. Product features and availability may change over time. Always check official manufacturer sources for current details. This guide does not cover every possible situation or wall type. Consult a professional for complex structural or electrical issues. Verify local building codes before starting major projects. Individual results may vary based on installation skill and conditions.